James Milmoe Doesn’t Miss a Beat

Jamming at the Cactus Club/Photo by Bob Reed

Reed Art & Imaging would like to extend belated happy birthday wishes to Denver photographer, teacher and lecturer, James O. Milmoe, who celebrated his 90th birthday at the Cactus Club in LoDo on April 21st.

“Jim was playing the drums when we walked in — I had no idea that he was a drummer!” said longtime friend, Barb Pullin “…and he was pretty good!”

Although the party wasn’t a surprise, the drum kit that Milmoe’s daughter, Robin, had waiting for him, was. It didn’t take any coaxing on her part for James to sit down and start jamming with the piano player. “I haven’t played in years!”, he told Betty Reed “It’s just like riding a bike!”

James Milmoe is good at a lot of things. Known for his trademark bolo ties (handmade by the man himself!) the photographer is equally well known for his outgoing personality and easy sense of humor and, of course, his many roles in the Denver creative community. His body of work is well-represented in practically every facet of modern media, including books, catalogs, magazines, newspapers, calendars, note cards, postcards, motion pictures and television.

In addition to being recently named as one of Westword’s 100 Colorado Creatives in Denver, Milmoe is a Fellow of the Photographic Society

At the Hal Gould Vision in Photography Awards/Photo by Sara Milmoe

of America, a recipient of the Colorado Governor’s Award, and a member of the American Society of Magazine Photographers. He also helped found the Colorado Photographic Arts Center (CPAC), so it should come as no surprise to anyone that he was honored this year with the 5th Annual Hal Gould Vision in Photography Award.

James is still working and exhibiting, with two recent shows, Up Close and Far Away: The Photographic Art of Jim Milmoe at The Pattern Shop Studio on Blake Street, Denver, and Stop/Look/See Photography by James Milmoe, at The Arvada Center.

Don’t forget to catch Jame’s appearance on the Arts District show on RMPBS, where he talks about what ‘Stop, Look and See’ can mean to the experience of looking at, not just the art of photography, but art and life in general.

Congratulations all around, James!


[social_web_link][/social_web_link]

Easy and Inexpensive Tips for Better Video Meetings

BadVideoInMonitor

So there you are, trying to video conference with the a client, vendor, investor, or mom and your video feed, well…. stinks. Nothing makes a bad impression like a bad impression.  I recommend that you always test your video setup a couple hours before you need to go live, making sure your webcam is working and the picture looks good. And just in case you need to call your tech support team or fix it yourself. Here are some basic and straight-forward things you can do to make sure a working system performs well.


Keep it clean!

Lens cleaner and microfiber are your friend. Get a cleaning kit from your local optician and keep your web-cam clean. Spray solution on the microfiber NOT on the camera. Gently remove junk and dust. The lens on your webcam is super tiny, so even a small spec of dust, lint or hair can have a major impact on image quality. Finger prints are worse, and can make your video look like it was shot through plastic bags – yuck. Leave the soft focus effect to Glamour Shots.

Can they hear you over all that noise?

Use a separate mic and turn off sources of background noise. The built-in mic on your laptop will

Head-worn mics sound much better than built-in computer mics and aren't as noise prone as a lavalier.

Head-worn mics sound much better than built-in computer mics and aren’t as noise prone as a lavalier.

likely pick up a great deal of background noise including the sound of your voice echoing off your walls. An inexpensive lavalier (Lapel clip style) mic can be plugged directly into the mic input of your computer. USB podcast mics can be reasonably priced if you don’t need portability. Head-worn mics are super the best of both worlds and unlike the lavalier, they won’t pick up the sound of your clothing as you move about.

When possible, use ear-buds instead of computer speakers. The sound from your speakers will be picked up by your mic and can lead to echos , feedback, or muddiness in your audio. Cheap ones can be purchased at the dollar stores but they’re not so good on your ear health. Be good to your hearing and invest in the best you can afford.

You can also get a head-set that has both head-phones and a boom mic. These are available from bulky down to slim and lightweight. Go light-weight if you’re not into that 80’s air-traffic-controller look.

A combo headset like this is portable, sounds great and can eliminate back-gound noise and echos

A combo headset like this is portable, sounds great and can eliminate back-gound noise and echos


Heloooo? Is anybody there? It’s important to use sufficient lighting.

CFL’s run cooler than halogen and incandescent.In low-light conditions, your camera has to amplify the signal it sees and this results in noise that looks like graininess, ugly color and lack of sharp focus. This get’s worse with lesser quality webcams. The light coming from your monitor should not be considered sufficient.  A minimum of two 60-watt equivalent lamps within 6 feet of your face is a good starting point. A couple of cheap Harbor Freight or hardware-store clamp-on work-lights – one pointed directly at you and one bouncing light off the ceiling can create a soft and pleasing look. Use compact fluorescent bulbs since they run cool and won’t heat up your office.

Avoid back-lighting else you look like a talking silhouette with glowing edges. This type of lighting can also create havoc with the auto-exposure systems in your camera that can result in a visual pulsing that will serve quite well to annoy your viewers.

Inexpensive and available from tool and hardware stores. The larger the reflector, the softer the light. Get better light by using two or more.

The bigger the reflector the softer the light. A 10.5″ dish is better than a 6″ dish. You can also paint the interior white to soften the light a bit more. This will help reduce pore detail and the visibility of wrinkles too! Not that any of us are actually concerned about such things…


Yeah okay but those work-lights look terrible in my carefully designed office. What then?
Ikea has some great looking work lights in both clamp, table and floor options.

Certainly a step-up from the look of a shop light. Would also make a great background light.


Nicely styled clamp light. Moves easy and clamps about anywhere. Larger reflector provides a decent light. Point one at you and bounce the light of the other off an opposite wall for great looking light.


Part of the same Ranarp series, this could easily be combined with a couple of clamp-ons to create some fantastic light for your video sessions.


China Ball style lantern from Ikea for wrap-around soft light

China Ball style lantern from Ikea for wrap-around soft light

In the professional video world there exists a type of light called the “China Ball”. Inspired by the round paper lanterns of China, these cast a omni-directional light that is super soft, very flattering and somewhat mimic the look of a professional soft-box except they throw the light everywhere – not in just one direction. The lighting is not inspiring from an artistic cinemagraphic point of view, but the lights look nice in the home or office. The lanterns are intended to be hung from the ceiling pendant-style and can be found at Ikea and import stores for around $5. https://www.ikea.com/us/en/catalog/products/70103410/ These are just the lanterns. You will also need a light kit that includes socket, cord and built-in switch. https://www.ikea.com/us/en/catalog/products/70103410/

Ikea has many stylish lighting options that mimic the china ball for under $20
Floor: https://www.ikea.com/us/en/catalog/categories/departments/living_room/10731/?priceFilter=true&minprice=7&maxprice=20
This model allows for both bounce and direct lighting in one. It is a torchiere with a side light mounted on a gooseneck that can be pointed where you like.
Table:
https://www.ikea.com/us/en/catalog/products/70096377/
and
https://www.ikea.com/us/en/catalog/products/40172462/


Quality video streaming also requires a good network, fast internet and a computer that isn’t running at a crawl. For more tips on improving your video chats, check out the post: Improving Your Google Hangout Experience.

Do you have some tips you would like to share? You can show your stuff and help others by adding your ideas to the comment stream below.

Improving your Google Hangout Experience.

GoogleHOABadgeThe rising star in online networking is the Google Plus Hangout On Air, or HOA for short. This medium mixes the experiences of video conferenceing, webinars, screen sharing and chat all in one easy-to-use package. The affordable (can you say free?) tool also comes with the added benefit of increasing your SEO, your personal brand and the leverage of your YouTube channel.

If you are not using HOAs now, I urge you to look into them. Here are a couple of resources I highly recommend to get you on the right track towards understanding the benefits.

Entrepreneur and Social Media coach; Sandra Watson over at EasyFYINow.com provides valuable direction for those new to any social media platform.

Carol Dodsley has a G+ mastery course for those who want to dig deeper into the G+ community. She also hosts several weekly shows on G+ that cover a range of topics. You can find one of Carol’s posts espousing the virtues of G+ HOAs here. 

NewRay.com has a great post that makes a great business case for the use of HOAs

Regardless of the platform, a good video conferencing experience requires some attention to detail to avoid bugs and other road-blocks. 

Having troubles with your video dropping out during an HOA?  Not getting clear video into your stream? Here’s a few things to do before you start your broadcast:

Attach to your network via Ethernet cable and turn off wireless at your computer.  Unless you are running the new experimental gigabit wireless, your Ethernet is likely to be much faster and less problematic.

Turn off all devices on your network that do not need to remain on during the broadcast.  When devices are on , they are routinely sending various signals across the network, potentially creating congestion. This network traffic then get’s “heard” by your computer causing it to take processing cycles to evaluate the traffic and determine if it is something it needs to pay attention to. Quieting things down on your network will help your computer focus it’s attention on your feed.

Speaking of quieting… Network and modem cables should never be running parallel and close to a power cord.  Power cords emit a small amount of radio frequency interference (RFI) that is picked up by your network cables. This causes glitches that will effect data transfer rates ( slows your network down). It’s nearly impossible to route these completely separated as often they at least need to cross over each other to get to where they need to go – in this case, do your best to cross them perpendicular so they look like a plus (+) sign.

Same goes for USB and Microphone cables too. Keep them away from power cords when possible for all the same reasons.

Use the chrome browser when possible. It’s developed by Google and will likely be the most stable for the hangout plugin.

Speaking of plugins, they suck.  Memory and resources I mean. 🙂 They consume ram, processor resources and are constantly pinging the network.  Turn off any plugins, search bars,  and extensions you don’t need for the broadcast.

Close any browser tabs you don’t need open. One tab can consume between 50 and 300MB of addition memory, depending on what is loaded into that tab. Also, tabs that are open could be sending traffic across your network. Shhhhh…. a quiet network is a happy and speedy network.

Turn off ALL other applications – including browsers – you don’t need during the broadcast. Not only are they slowing down your computer, they are likely using your network. Email apps are always looking for new email. You don’t want to be downloading 25MB of attachments while you are trying to stream 3MB per second of HOA video.

If you are running windows, you can temporarily turn of automatic updates to prevent activity during your HOA. Just remember to turn it back on later.

Run a valid copy of a good anti-virus and anti-malware application and keep it current and up to date. An infected machine = a slow machine.

If all of this is not enough to get things looking good then:

In dire conditions where you have done all of the above and are still having video drop-outs, uninstall any applications that you don’t use on your computer. Many of these applications monitor your network to talk to the devices you just shut off. Printer utilities are a big resource sucker and can often be uninstalled. Do you really need some bit of software to nag you when you are low on paper or ink?  Some of your installed applications will also check the internet every few minutes to see if there are updates available that need to be installed – thus slowing your network.

On windows machines: turn off file indexing. This “feature” does make it faster to find files on your machine, but it is also doing a great deal of disk reads and writes, perhaps during your broadcast.

Whew! Sounds like a lot to do, but it’s not really all that much.  Once you have cleaned your machine of any malware and removed old applications you don’t need, and moved your cables the tedious work is done.  When you are ready to do an HOA the easy thing is to reboot. This will close any applications you have running. When the computer comes back up and you login, open just Chrome, launch one tab to G+ and you should be on your way to a great HOA experience!

Don’t discount the benefits of a good mic, and adequate lighting. For more on that, have a look at the post: Easy and Inexpensive Tips for Better Video Meetings

Raw Versus JPEG – What They’re Not Telling You

In the ever-present quest for perfection, photographers from around the country call me weekly with questions about shooting raw versus jpeg. The debate over this topic has been waging strong on the internet since the advent of digital still-image capture. Creating confusion, every photo blogger and “expert” in the forums has their opinions. Each of them expressing “this is the right choice”.  Well today’s post is here to proclaim that it’s mostly bunk. There is no perfect answer that fits every photographer all of the time. The Holy Grail of file type is a myth and it’s time to stop looking for it and get on with the business of taking great images. The two camps in the JPEG versus RAW debate have strong emotional bonds to their “rightness” and are willing to go to great lengths – even as far as to embarrass themselves online while attempting to change the unchangeable minds of the opposing camp. They cling to the strategy of looking for evidence to support their case while ignoring the evidence of the other. In the end it just adds up to more confusion for the reader – who continues to be un-prepared to make their decision. If you are hoping this post will give you the right and perfect set-it-and-forget-it-forever options, you won’t find them, because I don’t think they exist – though you may find one that works for you most of the time. What you will find is unbiased data to help you make educated decisions before you enter a shooting scenario. You will also find enough data to see clearly why I made my bold statements against the “This is always the right way” mentalities.

Let’s get down to business
If you are a professional shooter, regardless of market you will likely have some of the following example criteria to consider as part of your decision making process:

    • On what standards do your customersdetermine quality of service?
      • How important is color accuracy?
      • How critical is the pixel depth (megapixels)?
      • Is dynamic range an issue?
      • What are your expected turn times from capture to delivery?
    • Technical issues
      • Are you shooting under controlled lighting and can control scene dynamic range?
      • What is the expected use of the image?  Web, press, photographic, pigment, all of them?
      • How large will the file be expected to print?
      • Do you have time for custom white balance?
      • Do you have time to verify exposure settings with a quality hand-held meter?
    • Business related
      • Do you see time as money?
      • Are you paying assistants or digital artists to post-process?
      • Are you paying your lab to color correct for you?
      • What is your present customer satisfaction rate and is there room for improvement?
      • Are you willing to spend some time, effort, and resources to impact product quality?
      • Do you expect your workflow to minimize the post-process impact on margins?

If you are a hobbyist, what are you looking to gain?

  • The best possible print.
  • To spend more time with family and less time with post-processing
  • To gain more control over the final image
  • To fit more images on the limited space of a card
  • Technical questions:
    • What is the subject matter?
    • Under what conditions am I shooting?
    • How will the image be used?
    • What is your personal criteria for quality?

Perspectives – it’s all a point of view
Before choosing your shooting format I recommend you first determine your priorities and make a list. When you know what is important to you, then the best choices can be made and most often with higher levels of confidence. For these examples, we’ll look at the typical requirements of each shooter type. Knowing the requirements will lead to understanding why a certain thing might be a priority. Photographers and business models vary, so results and opinions may differ. For the pro, they have to satisfy an end user in order to make a living. Often working with pro level tools to maximize image quality and speed the process. For some of the professional markets such as studios, time is an expense against the profit margin and customer experience may have the largest impact. For other business models such as fine art, it’s often maximum image quality that is the primary target. Studios are the business model most likely operating in some type of assembly-line type of workflow. They have dozens of images from each person or product shot and each of these files needs some kind of attention. Usually starting with elimination of the unusable, then selection of the prime images followed by editing. The artists that are paid to handle this process are usually compensated by the hour. The longer it takes to move a job through the work-flow, the deeper the cut into the bottom line. Quality needs to be maintained to meet or exceed the customer’s minimum expectations. The average consumer’s expectations are often that the professional print should exceed the quality of a drug-store print. As long as they can see a higher level print, that particular expectation is met (photographic skills such as composition aside for the intent of this discussion).  Skin-tones and most all other colors related to people photography fit will inside the sRGB colorspace. Studios have a great deal of control over their lighting, and thus the required dynamic range for the shoot. A good setup can usually hold within a 6 stop limitation of a JPEG work-flow. Interior location photography has additional challenges resulting from ambient conditions that might not be controllable. Office lighting, large windows, etc. can contribute to the overall lighting of a scene and may result in lighting ratios that exceed the 6 stop limit. In profit-centric people photography, merging brackets for HDR is rarely an ideal solution.

Commercial product photography has unique demands, especially when the product or person being photographed requires special staging and effects.
And yet the images themselves usually end up being used in the lowest of gamut conditions: 4-color press and the internet. In a complex shoot, where lighting, effects such as smoke or movement are in play, bracketing is not an option so maximum dynamic range is beneficial.  In table top product photography – think catalog photos – there is no movement, lighting is completely controllable and product colors rarely exceed the basic gamuts of Adobe1998 or sRGB. Since the subject does not move, bracketing can be used to maximize dynamic range.. Food photography brings the potential for highly saturated colors that would do well with a larger gamut and maximum control.  A commercial photo session often includes a day or more of styling, prep and active capture, followed by a similar amount of time in post. There are thousands if not ten’s of thousands of dollars at stake and final image quality can be critical to the customer’s end sales. Such diversity creates situations where JPEG would be most profitable and other times where a RAW work-flow is mandated.   The fine-art photographer is often most concerned with image quality. They seek an integrity in the image that jpeg does not deliver. Maximum dynamic range, sharpness, color fidelity and detail are all sought in the persute of the ideal print that meets the artist’s vision and the expectations of the descriminating print buyer. Fine art images are often heavily manipulated to create the mood sought by the artist and to bring out maximum detail. Through manipulation, detail along with any compression artifacts will also be brought to greater light. Artists will often use improper white balance to enhance mood and emotional response. The artist will often spend countless hours laboring over pre-planning of a shoot, and many financial resources are spent on models and assistants. The final editing is usually performed by the photographer rather than an assistant.

Pick a card, any card…
Prepared with the insights you now have into the requirements of a few professional photographer types, these charts should help clarify why one format type won’t properly cover every photographer’s needs, and how some photographer’s might benefit from both types during their day.

Jpeg Versus Raw, Capabilities by File Format Type

Basic Pros and Cons
Pros Cons
Raw
  • Can be any working space you have a profile for.
  • WB can be tuned post-capture.
  • Greater exposure latitude – though precise exposure is recommended.
  • Highest level of adjustment flexibility before causing gaps in histogram.
  • Best option if over-sampling is required.
  • Supported by Pro-level software
  • Non-lossy raw formats contain highest levels of color-fidelity
  • Takes the more time and resources to post process.
  • Larger in-camera and offline storage space requirements.
  • Must be processed before online sharing/distribution can occur.
  • Must be processed prior to printing
  • Additional software required.
  • Not supported by all editing software
Jpeg
  • Smaller file sizes maximize in-camera and offline storage space.
  • Proper WB and exposure can often go directly to print.
  • Easily shared via email and web with no additional work.
  • Lower time investments.
  • No additional software required.
  • Maximum software support both pro and consumer level.
  • Usually limited to sRGB or Adobe1998 at time of capture.
  • Any settings applied in camera i.e. WB, sharpening, noise reduction, etc. are “fixed” into the image – changes require post-capture retouching/editing.
  • Minimal exposure latitude of 1/8 stop.
  • Lossy format means you paid for resolution that you are sacrificing.
  • Typically does not over-sample well due to in-camera sharpening and compression related artifacts.

 Jpeg Versus Raw, Considerations by Photo Type

A successful photographer will learn the needs and expectations of their client, then support those needs through technical and artistic know-how, all the while minding the needs of the bottom line.

You can help our readers by sharing tidbits you have discovered regarding JPEG and Raw workflows in the comments below. And as always, we are here to answer your questions.

Looking for more LEADS through Social Media? This is a great place to start!

For my very first Google+ hangout I spoke on the panel as a Social Media expert for an HOA (Hangeout on Air) for SMGDenver and I had a blast! Lots of great information was shared. If you are looking to generate leads through social media, or looking to create an online business community with your existing social media platforms, this video is a great place to start.


Happy to answer any questions, so feel free to leave them in the comment section below.

5 Ways Your Camera Can Get You Busted

5WaysCameraGetYouBusted

One of the basic rules of citizen and professional journalism is:

“If it’s in public view and you’re on public property, you have the right to photograph it.”

Most of us would rather spend a week in the Department of Motor Vehicles before intentionally breaking the law. Unfortunately, as in all of life, the above rule is subject to many grey areas, areas that, without some forethought and a healthy dose of common sense, can spell legal trouble for Joe or Jane Photographer. So there are some caveats to consider before planning your next public photo venture.

An addendum to the first rule:

“Just because you have the right to take a picture does not always mean it’s prudent to do so.”

Also remember, there’s a big difference between taking a photo and how a photo is utilized, especially in regards to its commercial use. The issue of copyright is vast and ever-changing but that’s another story for another day. This list will focus on keeping you out of hot water during the photo op.


1) The Clear As Mud “Reasonable Expectation of Privacy” Rule

Be it amateur or professional photography, photojournalism or just plain photo-opportunism, the old catch-all rule of “reasonable expectation of privacy” is being strained to its limits.

Digital photography, the Internet, and most of all, the fact that an estimated 87% of the population does not leave the house these days without a camera (phone), ensures that everyone is a potential media maven.

Though they are bound by the same rules as professionals; I would guess, of that 87%— 86.9% are ignorant of privacy laws and have little interest in learning about them.

So this commentary is aimed at you, the serious and semi-serious devotee who works at and respects the art and craft of photography.

“Reasonable expectation of privacy” often comes down to context. Using a seemingly innocuous photo of a person (especially if they are well known) to illustrate a controversial article or story, is playing with legal fire.

On the other hand, elected officials and well known public figures give up certain rights to privacy when they make the decision to enter the public arena (this is where the “clear as mud” part comes in).

Applying this to a more un-famous level, a violation of privacy can occur with:

“The intentional intrusion upon the solitude or seclusion of another or his private affairs or concerns that would be highly offensive to a reasonable person.” Restatement of Torts 2d, Section 652B

Again the “clear as mud” part takes effect when the term “highly offensive to a reasonable person” rears its ugly head.

A “reasonable person” is often described in legal terms as a “person in society who exercises average care, skill, and judgment in conduct and who serves as a comparative standard for determining liability”.

A reasonable person is NOT the narcissistic pinhead who ambushes that lovely photogenic, hopelessly in-love couple in the park by circling around them a lá Cecil Beaton, motor-drive clicking away, as he bellows at them to “Work it!!”

This is very likely to get you a civil suit or a punch in the nose, and in this litigious age, the punch in the nose might be the lesser of two evils.


2) Barging Into a National Park Thinking You’re Spike Lee

National parks may have certain restrictions particular to them. Before a frame can be exposed, anything that smacks of commercial photography may carry limitations and possibly liability considerations. The proprietors at Yellowstone Park, for example, will not be thrilled if you waltz in with your production company and expect to shoot your indie film at the expense of the stunning natural surroundings. Permits will likely be required in cases such as:

A) Activity taking place in restricted area(s) of the park.

B) Using any sets, props, crew, actors, etc., that are not part of the natural surroundings or facilities.

C) Administrative expenses that park officials may incur to monitor and coordinate activity.

These examples may sound extreme for the average photographer who just wants to get off the beaten path and snap a few stills, but if they apply to you, skirting the bounds of any one of these points is likely to attract unwanted attention from park officials. If, however, you are a commercial or pro photographer and plan to stay on the beaten path, the same park rules that apply to the average visitor will generally apply to you. In the end, rules and regulations can vary from state to state and are often selectively enforced, so always check with The Local Powers That Be.


3) Showing Unusual Interest in Government Buildings, Military Installations or Barak Obama’s House

Yes, things are vastly different in the post 911 world. The New Normal has not been kind to Joe and Jane Photographer, particularly as it relates to government and military installations. Here’s the gist of the US Code, Sec. “Photographing and sketching defense installations”:

“… it shall be unlawful to make any photograph, sketch, picture, drawing, map, or graphical representation of such vital military and naval installations or equipment without first obtaining permission… and promptly submitting the product obtained to such commanding officer or higher authority for censorship…”

If you want to argue citizen’s rights with a two hundred and seventy-five pound MP (military policeman), go right ahead, but as anyone who’s spent time in a military brig will tell you, it’s a guaranteed no-win proposition.

And besides, US Code, Sec. “Photographing and sketching defense installations” sez so.


4) Despite Their “Awww Factor”, Children Have Rights Too

Yes, kids are adorable and they make great photo subjects, but no matter how benign ones intent, following them around a public street or park like a deranged paparazzi will quickly attract the wrong kind of attention.

Even if they may not know them, the average passerby is generally protective enough of small children to get on their cell phone and alert the police. Again, even with the most innocent of intentions, a photographer can find themselves in real trouble over seemingly nothing.

Children are entitled to a reasonable expectation of privacy in public; the same rights as everyone else. There’s not much they can do discourage the random nut job with a camera— and they don’t have the punching ability of Sean Penn. So, to avoid jail, keep a healthy distance from the little ones, or at least clear it with their parents before snapping away.


5) Photographing the Police While They’re in the Process of Beating The Crap Out of Someone

Okay, that headline may sound a little hyperbolic, but this has become an ongoing issue with the advent and proliferation of digital photography amongst the general populace. To be clear, any US citizen has the legal right to photograph an officer of the law while he or she is in the act of doing their job in a public place. Assuming that you are photographing from a reasonably safe distance from the action, you should be on fairly solid legal ground. Problems can arise however, when said law officer perceives said photographer to be an “obstruction of justice”.

This is where it can get a little tricky. Apparently, “obstruction of justice” can be a subjective term amongst the law enforcement community and may be defined as anything from physically intervening between officer and his subject, to standing fifty feet away on an adjacent street corner picking ones nose. Ultimately, it is up to a judge to decide, but in the heat of the moment, It’s pretty much up to the officer to determine what is or what is not “obstruction of justice”.

So be careful, arguing with a policeman rarely ends well for anyone and will usually guarantee you an overnight stay in the Flat Iron Inn. Once again, let common sense prevail. Take a deep breadth, explain your case if you must, but in calm even tone with a minimum of hand gestures and body language.

And above all, never touch a police officer in any way. The law is heavily weighted in their favor to help them do a very difficult and dangerous job. If your camera, film or memory card is confiscated; let it play out in court. Nothing is guaranteed, but never try to bargain with an officer during a heated scenario like this.

http://gizmodo.com/5900680/7-rules-for-recording-police


This article does not constitute legal advice and is not meant to be taken as such. It does, however, encourage Common Sense. Local statutes may differ from state to state, county to county, etc.. It is always a good idea to check with the local authorities if you are in doubt about anything, different places may have restrictions that are unique to them.
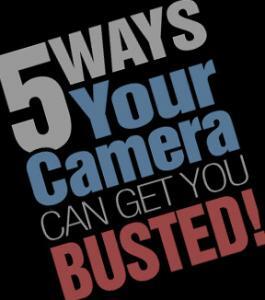
Giclee Fine Art Printing – Getting a Great Print Part 1 – Photography of Artwork

A Pigment print is a bit more than just an inkjet print. So what makes it fine art worthy? To qualify, the print must be achieved using archival grade pigmented inks on archival grade fine-art paper or canvas. While we love the look of the watercolor papers and canvas papers we don’t suggest using Giclee “photo papers”. For aesthetic reasons, we recommend that the artist get a fine art photographic print for that. But the quality of the fine art pigment print is not limited to the inks and papers you use. There is quite a bit more that goes into the craftsmanship than just the print alone.

There is a great many details that should be tended to, but the major areas can be broken down like this:

Photography of your artwork
Working the file before testing
Generating a worthy test print
Working the file again to refine the proof
Printing the final units or series

Each of these is important to understand so they may become an effective part of your workflow. Since there is a great deal of information to pass along,  I’ll split the content into a multi-part series.

Photography of art work

Every step in the production chain of your fine art edition is critical, but some steps, if improperly done, can be disastrous to the final viewer experience. The first step, photography of your artwork, is an excellent example. This step is the largest determining factor to the faithful reproduction of your original art. To create a great pigment print, the photography of the artwork should be:

  • Focused properly using high-end lenses
  • shot using a strudy tripod in a vibration free environment
  • photographed using the sweet-spot of the lens
  • in some cases, polarized light and or special lens filters may be required
  • exposed correctly with a critical attention to detail
  • evenly lit using the proper lights
  • correctly white balanced
  • shot in the proper file format and with sufficient resolution
  • shot in a colorspace that is large enough to capture the full range of the painting and supports the full range of the Pigment print

The right glass

Shooting with inferior lenses may result in various distortions, such as smearing around the edges, chromatic aberrations – where some colors focus differently than others, barrel or pin-cushion distortion, lens flares and overall lack of saturation and/or contrast.  Shooting with prime lenses and pro-level equipment will provide the highest possible image integrity and result in a file that achieves the closest honesty to the original.

Image courtesy of https://upload.wikimedia.org/wikipedia/commons/thumb/4/47/Lens6a.svg/200px-Lens6a.svg.png

Chromatic aberrations of cheaper lenses result in out of focus images with color fringing.

Image courtesy of https://upload.wikimedia.org/wikipedia/commons/thumb/9/91/Apochromat.svg/200px-Apochromat.svg.png

Proper apo-chromatic focus results in all wavelengths (colors) focusing on the same plane for maximum sharpness and detail.


Image courtesy of https://upload.wikimedia.org/wikipedia/commons/6/66/Chromatic_aberration_%28comparison%29.jpg

Bottom photo clearly shows effect of apo-chromatic aberrations.

Distortions, or bending of the image are another issue with lesser quality lenses with “pincushion” and “barrel” being the most common. Pincushion distortion has the effect of the center of the image being further away than the edges while barrel distortion is just the opposite. With barrel distortion, the center of the image appears closer to the viewer than the edges.

Image courtesy of https://upload.wikimedia.org/wikipedia/commons/thumb/5/5b/Pincushion_distortion.svg/200px-Pincushion_distortion.svg.png

Pincushion distortion created converging lines towards the center of the image

Image courtesy of https://upload.wikimedia.org/wikipedia/commons/thumb/6/63/Barrel_distortion.svg/200px-Barrel_distortion.svg.png

Barrel distortion creates diverging line near the center of the image


A quality image capture is not dependent exclusively on a good camera/lens combination.

A high quality pro level tripod is a must for the artist who is serious about photography of art

A high quality pro level tripod is a must for the artist who is serious about photography of art, and they are expensive.

All elements in the photographic process are important. For example: how the camera and art work are handled during the exposure process will add a measurable difference to the final product.

A good solid vibration free tripod is a must-have if you are serious about photographing your own work.  Any vibration in the camera or the original artwork during exposure will result in “motion-blur” that will visibly carry over to your reproduction prints. While lesser tripods may be appealing just because of their price, they are susceptible to vibration, “ringing”, sagging and slipping during exposure. Think of it this way, if cheapo gear would lead to professional results, then why would there be a need for “pro” gear, and why would the pros invest the top grade gear?

If you want to get the best looking print, and your are committed to doing your own photography of your art do yourself and your art buyers a big favor and use the gear that will get you fine art quality instead of drugstore quality.

A stable support for your artwork is equally important. Any movement in your art during exposure will result in motion blur issues that will leave the image looking out of focus or double-exposed. While it may be tempting to take your art outdoors for the photo session, keep in mind that your painting is much like a sail in the wind. The slightest breeze will result in movement in the artwork. Heavier breezes or gusts may damage your art. And shooting with only one light-source, such as the sun, does not provide even lighting across the entire painting. I know this sounds crazy, but it has to do with what is called “angle of reflection” This is basically a measurement of the angle the light-path takes as it reflects away from the subject towards the viewer or camera and it is always equal to the angle of incidence (the angle the light path takes to get to the subject).

The propensity of light falling on a subject will reflect away at an angle equal to that of it's source.

The propensity of light falling on a subject will reflect away at an angle equal to that of it’s source.

Light falling on your canvas is more likely to scatter in a direction away from the light source. So let’s take the example to the right. The light source, in this case the sun, is to the left of the painting and the camera is directly in front of it. As we move across the canvas from left to right, we have less light reflecting in the direction of the camera lens. This results in the right side appearing darker than the left. This is called “fall-off”. Our eyes and brains adjust for fall-off for us, so we tend not to see it with the naked eye. While much of the light will “scatter” off in multitudes of directions, it is not enough to eliminate fall-off.

Since our light source is high and to the left of the subject, the brightest area will also be high and to the left.

Since our light source is high and to the left of the subject, the brightest area will also be high and to the left.


Shooting indoors gives you the greatest control over your environment for lighting and stability. When possible, setup your tripod on a concrete floor. Wood floors have flex and tend to amplify vibrations like a spring-board. If you must setup on a wooden floor, try to locate the load bearing supports under the floor and set your tripod in that area to minimize vibration. The farther you are away from the supports, the more amplified the vibrations.

Stay tuned for the next post in the series on Proper Lighting and Exposure. You can subscribe to our newsletter or via RSS to be notified automatically.


Are Your Photos Ready to Survive Wildfires and Severe Weather?

I read a newspaper article in the Denver Post about the wildfire in BoulderHouse fully engulfed in flames Canyon, Colorado and the tragic losses the families there are suffering. The primary focus of this article concerns a couple, Barry and Kate, who lost their home once before to wildfires and may have just lost it for a second time to this fire. Kate is quoted as saying that as they fled this time they packed their ski gear, bikes and photographs. “The main thing is we got our photographs, because those can never be replaced” says Kate.

On their way out of the burning canyon, they stopped to help an elderly neighbor; Erna Means. What do you think Erna grabbed as she abandoned her house to possible total destruction? You got it, a box of photographs! Isn’t that what you hear all the time when someone asks what you would rescue as you’re running out of a house that is burning, flooding or being blown away? Photographs are always on the top of the list right after pets. That’s wonderful that people are so protective of their memories, that they feel photographs are irreplaceable, while everything else can be replaced.

If only people would be that concerned when a tragedy isn’t about to strike. You don’t hear about all the important images and memories that are lost forever, every day throughout the world when hard drives fail or CDs and thumb-drives become unreadable or cell phones and computers are lost or stolen. Anguished screams happen all the time. But it’s just not news worthy or important enough, until it happens to you or me. Backing up or archiving your memories is so easy to do but also so easy to forget and maybe a little time consuming, but oh so important. Check out my previous blogs titled “Digital Image Archiving – The Lost Generation parts 1 and 2” for ways you can protect yourself from the most probable cause of image loss, computer failure and advancements in technology.

Larger and Faster Storage is on the Horizon

Larger and faster storage is on the horizon!
At the current rate at which silicon-based technology doubles – approximately every 18-24 months, it won’t be long before our cameras outgrow their present storage form-factors. Nikon, SanDisk and Sony have announced their joint effort for a new portable storage specification aimed at meeting the future needs of music playback devices, digital cameras and video capture devices in a new standardized format.

The new proposed specs show a transfer rate of 500 Megabytes per second – far exceeding the present 167 Megabyte per second of the current CompactFlash specifications. Yes, that is a full gigabyte transferred every two seconds. The maximum theoretical storage capacity for the new devices are expected to exceed two Terabytes. These new memory cards are planned to be rugged, similar in size to the existing SD form-factor and have a lower power consumption and longer battery life – thanks to integrated power scaling. With the data speeds and power savings, I suspect we will see this new technology integrated as solid state drives (SSD’s) on laptops, smart phones, and other intelligent devices in sectors like medical and transportation. A projected production date for the new cards was not announced.